This article is a HOWTO on managing your Linux system with Webmin. Using Webmin can be helpful when configuring daemons or multiple servers on a network.
What is Webmin?
Webmin is an open source management system for nearly any Linux/Unix distribution. Unlike other paid control panels, Webmin is completely free. Webmin is a great alternative to Cpanel. The entire Linux system can be managed from within a web browser, making it extremely convenient. Webmin is a fairly popular solution and is deployed on many webservers around the world. It is provided as a standard package with Solaris 10, and a optional add-on to Clarkconnect.
Why use Webmin?
While every aspect of the system can be managed through a shell, Webmin can save you time in certain areas. Personally, I created a software RAID array using Webmin in only a few minutes. Throught a shell, you would manually have to chose some partition settings, mount and unmount file systems, etc. Webmin can be a good tool for novice administrators trying to learn more about the way Linux manages software packages and hardware. The following sections will not only show you what Webmin looks like, but will also provide some good tips and things to watch for when using Webmin.
Installing Webmin
Webmin can be installed using the RPM format (Redhat) or built from source. Since I am a big Redhat user, I took the easy way out and installed the RPM. It is even easier than installing a package on Windows. To install the RPM format, use the following steps:
- Download the appropriate package (you can find it at www.webmin.com)
- Install the RPM file using the this command: rpm -i webmin*
- Watch the install process
- That's It!
By default Webmin runs on port 10000. You can login via a web browser. If you are logged onto the console you can access Webmin at: http://localhost:10000 If for some reason localhost doesn't work, or your server name isn't resolving properly, you should be able to access Webmin by IP address. Unless you are positive your hostnames and DNS settings are correct, it is a good habit to use the IP address. If your server IP was 10.153.123.51, then you would call webmin with http://10.153.123.51:10000 However, some pre-installed instances of Webmin run over HTTPS, so be aware that you may need to use https://x.x.x.x:10000 to access your Webmin control panel.
Using Webmin
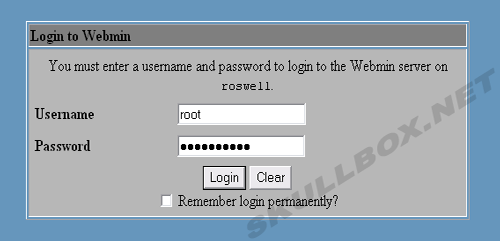
The first time you login to Webmin, you must login as root. You can create other Webmin users with various permissions later. If Webmin is installed and running, you will see the following login prompt.
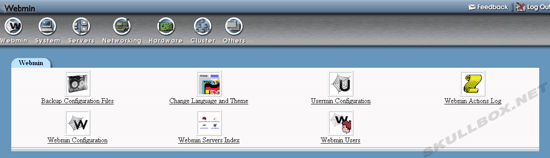
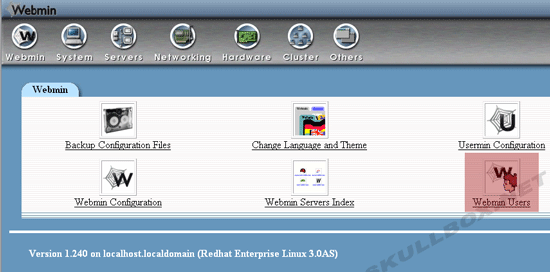
After logging in, you will see the following list of icons. Along the top, you will see the different categories. The icons in the lower pane are different sections or "modules" for each category.
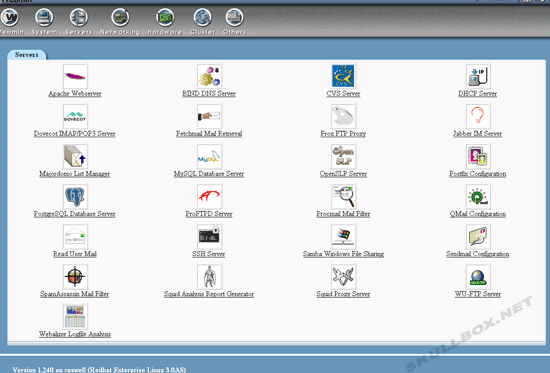
For instance, when I select the "servers" icon from the top, I am presented with the following modules.
You will notice that there are various daemons listed. I don't know who decided these are the standard daemons, but just because your see the icons, that doesn't mean you actually have those packages available for management. For instance, in the selection for servers shown above, you will see "Qmail configuration." Qmail is not installed by default or available from the RHEL installation media. A package like that would have to be manually downloaded, built, and installed. Once it is installed, you will be able to manage various aspects of it through Webmin. Let's take a look at the Webmin configuration for Apache.
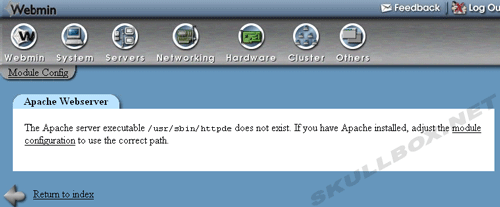
As you can see, when you pick the apache module, you are presented with a list of global configuration options. These options include various things such as listening IP addresses, appended startup parameters, and so on. If apache is not present, or not installed correctly, you will know right away because none of those options will be available. You will often get an error message that looks something like this:
Suggestions for Webmin
The best way to get good at Webmin is to install it and play around. Webmin is great tool for both administration, and noobs for learning more about the way Linux/UNIX operates. I always recommend installing it on a test box. DO NOT install this on a production machine and start making changes if you don't know what you are doing!
Usage Tips
You should observe the following tips when using Webmin:
- When configuring something, make 1 change at a time
- Create a "non-root" account
- Check for updates
When configuring or re-configuring daemons, you should make only 1 change at a time. After each change, make sure you daemon operates as expected. It can be difficult to troubleshoot something when you have changed 5 different options in the daemon settings. If you take your time in the beginning, it will save you time in the long run.
You should always create a non-root account for Webmin. You can do this from the main Webmin settings. There is a module called "Webmin Users."
If you are going to login to your server from a public location, you may want to use a non-root account. This will allow you to specify certain modules. This is important because if you are using a public machine, it may have a keylogger on it. Don't let your box get OWNED!
Last, check for Webmin updates. As with most software, the newer releases fix problems and add features. Honestly, who doesn't like more features? My favorite thing about Webmin is the clustering feature. It allows you to easily add multiple servers to form a cluster. You can find more information on clustering here. I use a combination of Webmin, SSH access, and VNCserver to manage all of my RHEL servers.
Contact Us
NOTE: this form DOES NOT e-mail this article, it sends feedback to the author.
|
|